Cabinet:
Side Art Restoration Continued:
Using the flattened solid-color photo shown previously, I used a tracing program (you can use "Corel Trace 11" or "Macromedia Flash 8" or other) to automatically trace the outlines of the colors of the photo. What you end up with is a vector based image that looks like the original photo without the solid colors. It will also be very jagged around the edges since the tracer will draw lots of little lines using the pixels as a guide. This is still no good for producing new sideart stencils or mattes, but at least it is now a vector format and that is half the battle won.
The next step is to save the newly created vector image in a vector format. I prefer DXF (drawing interchange format) because it is the most universally accepted vector format that exists.
Next, I imported the raw jagged vector DXF image into a CAD program. In the CAD program, I was able to create new layers upon which I could draw new and perfectly straight-edged shapes over the original rough-edged tracing image. The intent here is to eventually delete the layer containing the original rough tracing image leaving only the new clean tracing image. Also, I used the same source image to trace both of the new layers, the red and the blue.
Obviously since much of the original blue painted shapes were covered by red shapes, my tracing image didn't show any of the hidden blue objects. However, by looking closely (using my superman'esk xray vision) at my machine, I could make out where most of the hidden blue areas were under the red paint. Thus, I was able to make educated guesses as to exactly where to fill in the blue shapes in my new vector drawing.
The final step in creating the new vector drawings files, that would be used to cut new stencils or mattes, is to delete the old tracing image layer and to scale the image to the exact correct size to match the image on the original machine. To do this, I measured a whole bunch of heights and widths on the machine itself and recorded them. I then scaled the drawing in the CAD program to match. Simple as that.
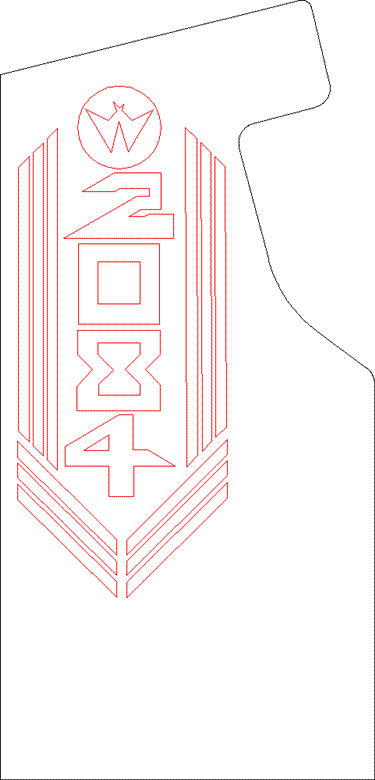
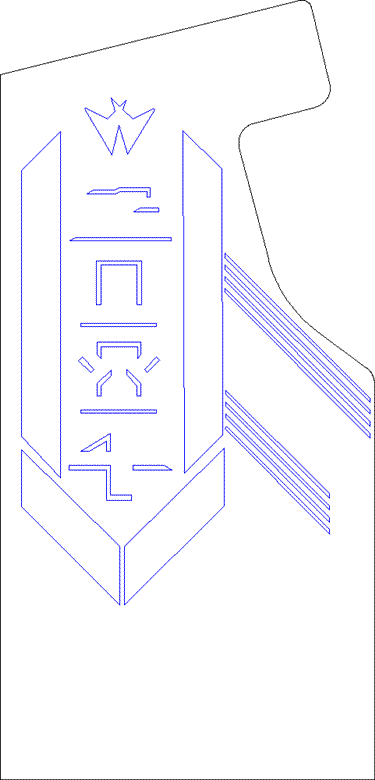
Here's what the final DXF vector sideart files look like for the righthand side.

Okay, so now I have my new sideart vector files. I took these files to my buddy across the road who happens to operate a very nice art gallery. He has a nifty piece of equipment called a CNC matte cutter. This machine has a large vertical table upon which you place a large 60" x 40" matte board. A matte board is a high density paperboard about 1.5 mm thick. All I had to do at this point was load the vector file and watch the machine cut my new mattes. I didn't even have to pay for the big sheets of media or to use the machine. Why not? It turns out the guy loves the old arcade games so I just let him come over to my place to play my arcade games as much as he liked. How about that? My machines earned something, not quarters, but free services and materials, and that's just as good as money.
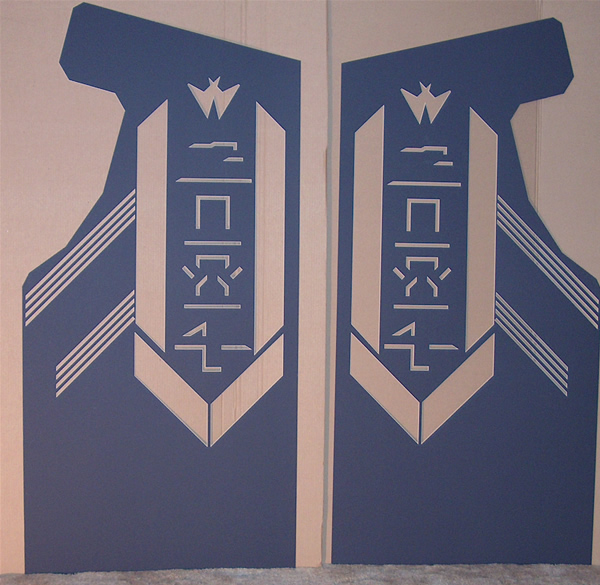
Here's a picture of the finished "blue" mattes standing against a sheet of cardboard. The "red" mattes are obviously similar. I can't wait to start painting! I know someone out there is thinking "Hey, they look too short." They are. The matte sheets were 60" long but the cabinet is taller than that, however, only the top section is of interest and the bottom part of the cab can be easily covered during painting. Another detail you might notice is that the radii of the cabinet appear as a series of flat lines. The software of the CNC matte cutter did this while importing my DXF files (which have the correct curves). I don't know why it happened, but fortunately in this case, it doesn't matter. The circle around the "W" symbol in the red matte came out perfect.

Go back to page 9 ---- or ---- Continue to page 11
Arcade List ---- or ---- Home
