
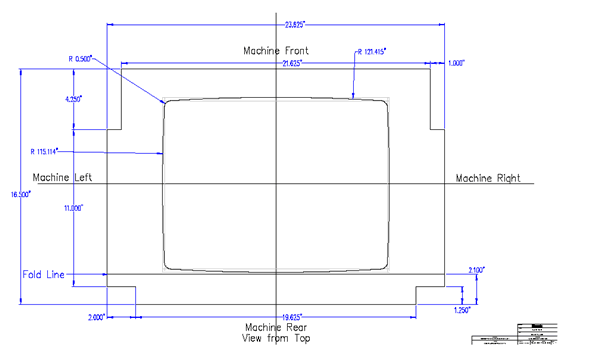
When I got my Battlezone, the CRT overlay was in very bad shape. The black cardboard shroud that surrounds the CRT is flat so it is easily duplicated.
You can take the original shroud cardboard piece to a local picture framing store. Using the original piece as a template, the person there can make a new shroud from flat black picture matting material. It's about 3/32" thick and is stiffer than the original. Alternatively, you could just buy the material and cut it yourself but it is unlikely that the edges would turn out as sharp.
The red and green transparent filter sheets were covered with dirt, scratches, and a lot of adhesive left behind by old tape. They had to be replaced. I ordered free color filter media swatch books from http://www.mainstage.com. I used these to match up the original overlay sheets with exactly the correct color media. I ordered the sheets online. One 20" x24" sheet of each color is all you need. I cut them to size and attached them to the new cardboard shroud with mylar tape (it'll last forever) to make a completely new CRT overlay.
Filter Media:
The original sizes of the filters are as follows:
Red: 4.25" H x 16.5" W
Green: 10.25" H x 16.5" W
I recommend making the new ones 2" wider as follows:
Red: 4.25" H x 18.5" W
Green: 10.25" H x 18.5" W
If you have the original cardboard overlay in one piece, then you can use it to trace out a new one. If you do not have the original or if you'd like to cut a new one using an automated CNC method, then feel free to download the following drawings in dxf and pdf formats. To print these drawings to scale, you'll need a plotter capable of printing a size E page (34" x 44")
Instead of cardboard, you can use 1/4" thick black foam board. Use the kind that is black inside, not white. In this case, you must be aware that the original overlay had a flap along the rear edge that was folded upwards. You cannot just fold up the flap with foamboard like you can with cardboard. To fix this, you simply cut the board along the fold line and then glue the piece (that you just cut off) upright on top of the rear edge of the board. The glue that I used was called "Automotive Goop". It is thick, clear, adheres well, and dries fast. Also, before you glue on the vertical piece, be aware that you have to cut off about 3/4" at each end so that when you are sliding your new overlay into the machine, the vertical part of it will clear the wooden siderails inside the cabinet. The original overlay could slide in flat first and then fold up once inside. Your foamboard is rigid so cutting off these 2 bits near the ends is necessary.
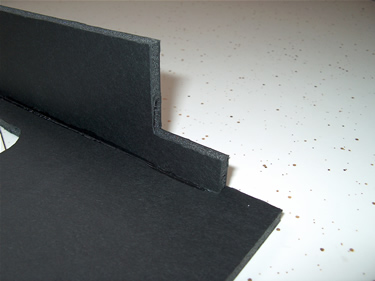
Here's what the foamboard looks like after you cut off the piece along the fold-line, cut off the tip of it, and then glue it onto the main piece in the vertical position.
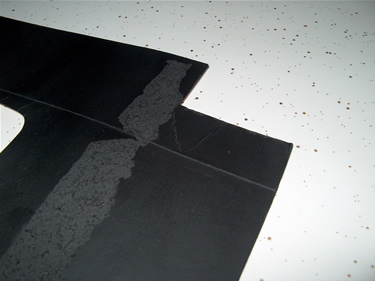
Here's what the cardboard shroud looks like in the same area when it is not yet folded:
Here's the new finished foamboard crt shroud (view from top, machine rear at bottom):
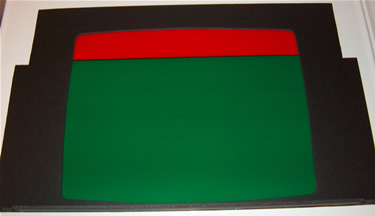
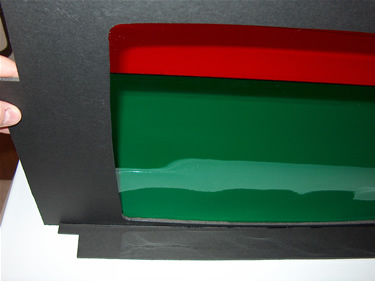
This view from the bottom side provides a glimpse of the self-adhesive 1.5" wide mylar tape that I used to secure the filter media sheets to the board. You should align the sheets so they overlap each other by about 0.1". I applied a 0.5" wide strip of clear mylar tape along the seam. I centered the 2 colored sheets on the board such that the top and bottom edges were the same distance from the board edges. This put the seam between the colors right where it should be. The seam is somewhat hidden from view by the image from the backdrop artwork. On my machine, I couldn't see it at all.
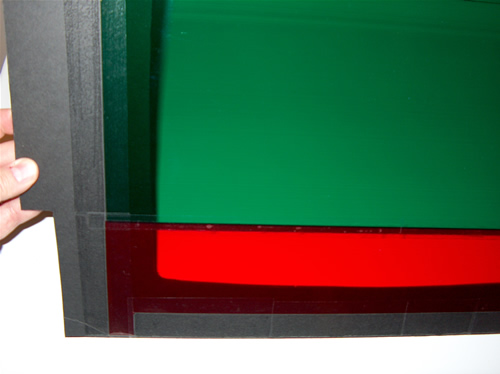
Also, right near the top edge of the board, where the edge of the red sheet almost meets it, I decided to cut the red sheet back about 1" from the board edge in order to allow the mylar tape more board to stick to. I would have done this at the edge of the green also but there just wasn't enough board width in that area to do it. Note that the seam between the colors looks very wide in the image above. It's not. It's only 0.1" wide. It just looks wider because the camera flash went through the green sheet to the white background at an angle. The dark band you see along the edge of the red area is the shadow of the green in the background.
I'll admit, the tape rolls are difficult to source and can be expensive so instead of using a tape roll, I cut out strips from single-sided self-laminating sheets. My favorite ones are the Avery 73603 product. I like this material because it is thicker and much more durable than regular tape, it's glossy clear, acid free and won't yellow over time. The adhesive is high quality and won't let go even after many years. I use a plastic spreader to apply it to avoid creating bubbles. After apply it, I use a small hand roller to press it down harder and make it look more clear. It tends to stick even better after rolling.
Avery# 73603, Self-Laminating Sheets, 3 mil, 9x12", 25 per package
Fellowes# 5221502, Self-Laminating Sheets, 3 mil, 9x12", 50 per package
Dollarama store, Studio brand# 05-3021983, 3 mil, 8.75x11.5", 3/pkg, $2
- sorry, no product link available
-These sheets are slightly harder to apply but are much cheaper than other brands
Correct Monitor Installation:
Sometimes people who have worked on the machine over the years have removed the monitor and then replaced it such that the monitor's metal frame flanges are bolted on top of the wooden frame. If the carriage bolt heads are still in the steel flanges (so that the square keys are in the slotted holes), then two things go wrong:
1/ The bolts are hanging downward and interfere with the L-brackets that secure the wooden frame. This makes getting the monitor in and out of the cabinet very difficult. If you have to remove your mirror because you have to lift your monitor to get it out, then you likely have this problem.
2/ The entire monitor sits higher by the thickness of the wooden frame. That's about 3/4". This causes big problems with the color filter overlay because the center of the CRT will be pushing up on the middle of the filter sheets. This will likely cause severe warping of the sheets and bending of the cardboard shroud.
View from above. Note that the metal monitor frame flanges are under wooden frame, not above, and that the carriage bolts come up so that the nuts are on top.
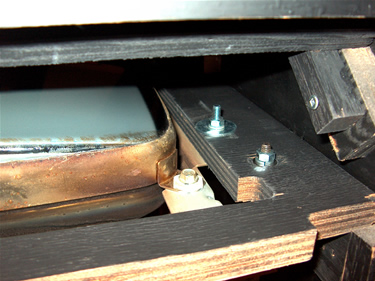
View from below. Note position of carriage bolt in L-bracket securing wooden monitor frame.
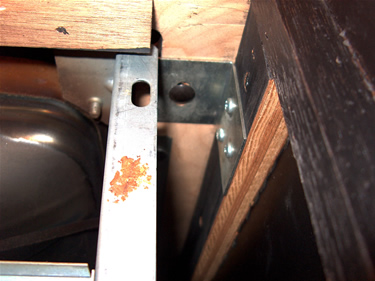
Mounting the new CRT Shroud:
Whether you made your new CRT shroud out of cardboard or foamboard, when you go to slide your new CRT overlay into the cabinet, you probably will not be happy about the way it lies on the high center point of the CRT. The colored filter sheets are pretty thin and they bend and scratch easily. You wouldn't want the weight of the cardboard or foamboard to eventually pull the whole thing apart. In factory original machines, the filter media was thicker and stiffer but even so, Atari did not do a good job of supporting the CRT overlay. Typically, the overlay was just hung inside with a few staples shot into it roughly near the four corners to hang it up and the entire monitor was slid in afterwards. Often, the high center point of the CRT pushed up severely on the colored filter sheets. Over the years, the tape holding them fell apart. The CRT overlay eventually had to be removed for cleaning or repair or whatever. The staples didn't make it easy to remove or replace it either. If you're like me, you won't very likely want to start banging staples into your new piece of CRT overlay artwork. A situation like this makes you wish that Atari had made their CRT overlays the same way Cinematronics did! Those CRT-form-fitting gel overlays were really the ideal solution.
To solve the CRT shroud mounting problem, I made a couple of 7.5" long x 0.75" square wooden support rails.
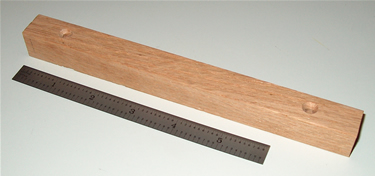
I secured the rails to the sides of the cabinet with two #8 x 1.25"L wood screws each. I located the new support rails such that the top side of the rails was exactly parallel to, and 2" above, the surface of the wooden monitor frame. Since my new foamboard CRT shroud is fairly rigid, it just sits flat on top of the support rails, 2" above the wooden frame. That puts the center of the filter sheet area about 1/4" above the high center point of the CRT. This way there's no stress on the filter media. If you use #8 wood screws like I did, drill some pilot holes using a 1/8" bit. Drill the 2 holes in the rail first and then use the rail itself as a drill guide/template to drill pilot holes into the cab. I adjusted my drill bit length such that it was impossible to drill holes in the cab sides more than 1/2" deep. We wouldn't want the drill to come out the outside through our nice sideart would we? Once the pilot holes are all drilled, re-drill the holes in the rail boards using a 11/64" bit, then countersink them. Do not drill the cab holes again with the larger bit or your screw threads won't have anything to grab onto.
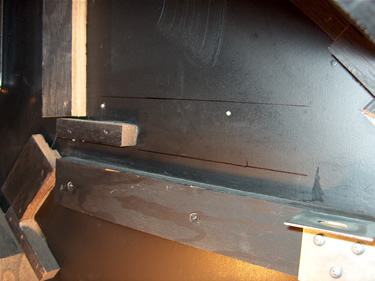
Here's the inside of the cab before installing the new rail. The two lines show where I've marked the level of the top of the wooden monitor frame and the where the top of the new rail will be, 2" above the lower line. The 2 bright dots just below the upper line are the pilot holes for the screws that hold the rail.
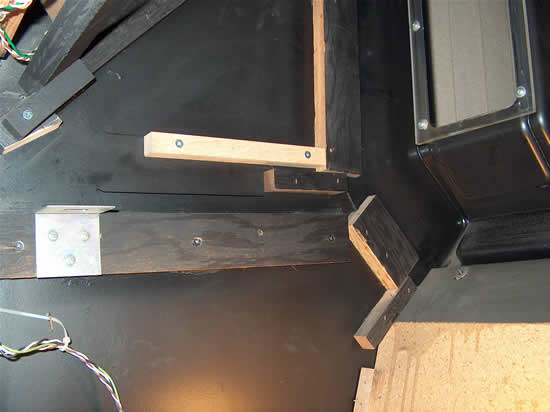
In the next photo, you can see a new rail mounted in its final position. This is a really slick solution, but it requires you to tilt the shroud to an angle of about 35° while inserting it from the the rear so that its leading edge will rise up and clear the CRT and also go above the support rails. If the monitor is inside the cab, there is not enough clearance between the wooden monitor frame and the bottom corner of that small board on the side of the cab that is supporting the mirror brace. In the photo, this wooden block corner is shown at the extreme left above the steel L-bracket. I had to cut off that lower corner of the blocks on both sides before I could slide my new CRT shroud up and into the cab. If the monitor is not inside the cab, you can probably get the new CRT shroud in and out without cutting the lower corners of the blocks off. I chose to do it because I just know that the day will come when I will want to clean the dust out of there without removing the monitor in the process.
Well, that's a job well done and it's finally time to play it full color !!!
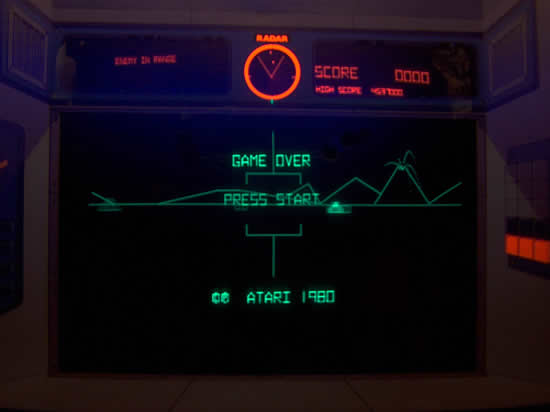
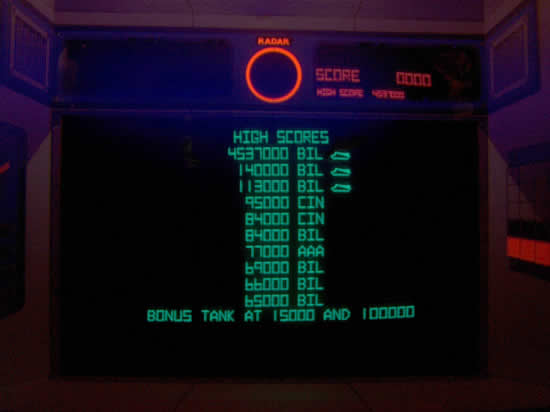
Hey, check out that wild high score eh? I know what you're thinking, it's a photoshop trick or something right? No, it's quite real alright. While it may not actually be an impossible score to achieve, I know I'll never even come close. I got the 4,537,000 score while playing but some sort of game program bug produced it. I took a shot at a saucer and while the shot was still in flight, a missile came at me. I kept clicking the fire button hoping it would shoot again before I got nailed. It did shoot again and I got the saucer and the missile so close to being at the same time that the sounds of the hits interfered with each other and suddenly the crazy high score appeared. I have a hi-score save module installed in my machine so it faithfully saved and restored it so I guess it's not going anywhere unless I decide to reset the scores. Nah.
Arcade List -- or -- Battlezone BPROM Replacements -- or -- Home