It's about time to complete this assignment!
Once again I am surprised at how time gets away from one... days turn into weeks, weeks turn into months and before you know it, those months add up to a year. It's been 15 months now, since I had all these parts ready to go, including an old clunker Ms Pac-Man I picked up just for a working model to use for pic's to accompany this rambling. I mean, even the fingerboards were cut & drilled, but I just hadn't been able to squeeze out the time needed to do this. Well... this Memorial Day weekend I decided I just had to make the time to do this or it would never happen!
In starting out I ran into the typical things with the Ms Pac & figured since I had the digital camera at my side I might as well doc the jump start of this poor old decrepit, warehouse-aged & most assuredly, non-working game. Click here to skip this preparation & go directly to the Pacpower Adaptor . I started off by cleaning out the bottom of the cab.. something you should do before applying power to any game that you've just bought or even moved from your own garage into your game room, as loose metal pieces of all sorts are lurking around the bottom just waiting to short-circuit your game & your hopes... nuts, bolts, washers, screws, nails, gum wrappers, cigarette wrapping foil ( you know, the stuff ops use for new fuses :-) metal knockouts, coin diverters & this is just the metallic objects! Hmmmm... we know how all those swizzle sticks got in the bottom, but how in the world did someone get Twinkie wrappers, potato chip bags & the like through that little coin slot!
K... I got all the junk out & did a visual inspection of all the connectors & wiring & everything was there & didn't *look* too bad, so I grabbed a new power cord to see what I had... a bit antsy after a 7 year hiatus from the repair scene, but I was hoping to get lucky. Did I? Did you win the lottery this week :-) It roared on alright... that deafing hum that tells you that it's time for a new fuse block & edge connector, but I waited for a sign of pic tube life & when it didn't emerge I hit the coin trip switch. Ah... sound.... game works... ugh! A G07 monitor, but that flyback looked real strong & I can see the warm glow of the CRT filament, so it's time for a quick check of the tube by killing the shop lights. Ah... there's Ms Pac running around in the dark. Turning up the screen control washes out what little pic is visible. This is not good... all colors so low that you need the lights out to see anything even with no gray plexi in place. It's time to get the CRT tester/rejuvinator out & dust it off.
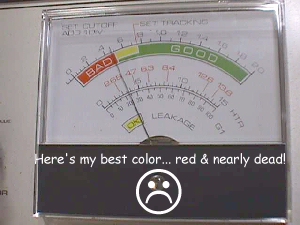
Another tube has died from lack of use. This is one more good reason for me to be working hard in retirement... so I don't rust up & start up with the low emissions... yikes! I don't know how many times I've heard that the monitor that I just declared dead was the best pic that the owner had ever seen before it went into storage. Oh well... I'll see if my luck with rejuvination is any better than it's been thus far :-(
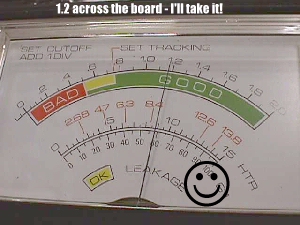
Call me lucky!! One boot a piece for the 3 guns & they're looking healthy at 1.2 all around. Time to listen to the hum again because I have to see the results. Hummmmmm..... yes! The pic is as good as it was when it was new... well, almost... but hey... these characters aren't suppose to be breaking up all over the place :-( Here's where I take 2 hours off, take the game board to my work bench & get out my trusty 2 lb maul to reseat all those chips. A little stitching up with some wire wrap wire & it's as good as new ready to go to work again. Let's see, so far the monitor is bad, the game board is bad, the wiring is bad, the connectors are shot, the fuse block is shot, the fluorescent light needs the works to revive it, needs a control panel complete & a coin door complete, the cab needs overhauling... wow, what a treasure I have found :-) This is sure gonna be fun, I can hardly wait.
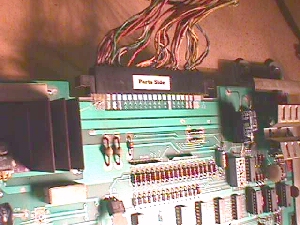
Here's something that I always do before ever taking that old Amp wannabe edge connector off the board and that is to put a *parts side* label on it. There is no end to the number of times that a Pac connector has been put on backwards. I had a tech stop by last week that has been making his living for the past 30 years in coin-op & what does he ask me... what kind of problems should I look for after plugging up a Ms Pac harness backwards & having everything go dead? I told him if he was lucky.... luck seems to have a lot to do with coin-op repair :-)... all he would need to do is change the fuses, and he was, but shouldn't he have known to check the fuses in the first place. Sometimes it's the simplest of things that get overlooked by even the pros.
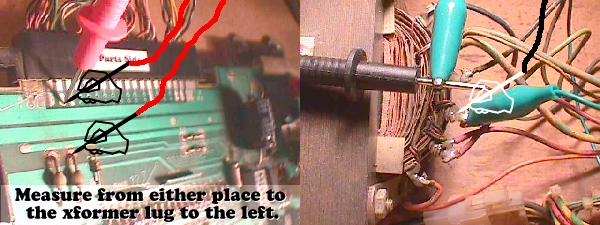
Onward with the repairs... the quad fuse block & new real Molex edge connector need to be installed next, but lots of you ask how you can test to be sure that you need this done. If it's OEM, it needs to be done, but if you want to see anyway, all you need is an ohmmeter to check the continuity of the wiring from the time it leaves the xformer till after it enters the game board. In the pic above you can see that if you put one lead of the meter on the xformer's 3rd lug which has a green wire attached, and you put the other lead on the board's "D" pad, or the anode of A7 as shown, you are measuring the continuity of the green wire, through the 2 solder joints of the fuse holder, the fuse holder, the break plug just before the edge connector, through the edge connector & it's terminal (pin) right to it's destination, so if you get an infinite reading you know that leg is open somewhere along the the way. If you measure more than 1 or 2 ohms you know that circuit is in trouble. Here are my results below.
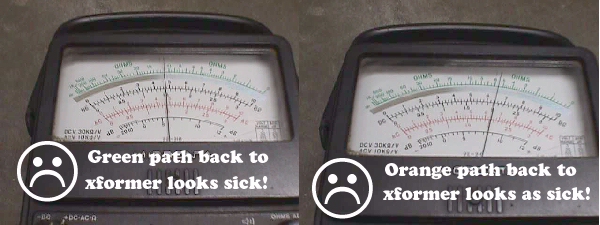
On the left is what the green path looks like & on the right is what the orange path looks like measured from the first lug of the xformer with orange wire attached, to the board's "C" pad or anode of A8 as shown in the pic below.

In the case of this Ms Pac where neither line is completely open, I suspect that one or both are opening up as soon as current attempts to flow because of the loud audible hum usually attributed to an open line. Pull one of your 7 volt 5 amp fuses from the holder & power up if you want to hear the hum. Normally, with readings of 8 to 10 ohms on these lines it only produces a slight hum accompanied by hum bars in the pic... black bar drifting through the pic.

The pic above shows the final path to the board... the center tap between the green & orange & going to ground on the game board. This red wire when connected to ground divides the 14VAC output into two 7VAC supplies.
K... I've changed the fuse block & I guess I have to change the dreaded edge connector next. Both of these have been doc'd elsewhere on the BBBB, but I'll take another pic of the connector being changed out while I'm pausing here.
Good Lord! I hope y'all are still awake... looks like I've put Alice to sleep with all this rambling :-(

The pic above shows the old connector hanging with the first half dozen wires transferred over to the new Molex... one at a time to ensure no mistakes... and you can see the one wire in mid process of moving. Briefly, the process is to snip a wire about a quarter inch above the old connector leaving you a color code on the old one that may come in handy if the phone rings, and it also gets rid of the stressed wire going into the old terminal. Next strip the wire end back about a quarter inch & crimp on a shiny new Molex split pin & insert it into the Molex housing in the same position as it was in on the old connector. When you're all finished you can compare the new to old in a side-by-side fashion to see that all wires did end up in the same positions as they started in.
After a sucessful transplant I took the measurements over again from the xformer to PCB & all results were the same & you can see from the pic below the proper reading for a good pathway.
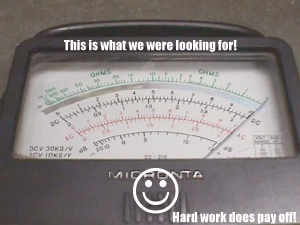
Alrighty then! We've got a good working Ms Pac-Man to procede with the conversion kit assembly, so I guess it's time to go back to the workbench & put together the adaptor... without the use of the 2 lb maul this time! I like to put a thin cardboard sheet on the bench to work on to make cleanup a snap. It might work for you, as well.
The first thing to do is cut all your wires to length & prepare them so that the project will flow along smoothly when you get to the stage where they are needed. You're going to need them cut to the following lengths:
Strip back one end of all wires approximately a quarter inch & tin them with solder & set them aside for now.
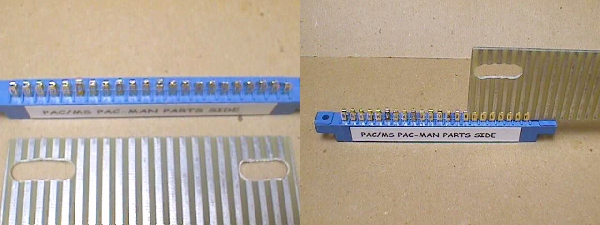
Take the 22/44 position solder eyelet edge connector & pinch the eyelets together, so that they form an upside down v the whole length as in the pic on the left below. Incidentally, I'm often asked why I use solder eyelet edge connectors rather that the solder tail versions that are a fraction of the cost & the reason is that solder tails are made to mount on a PCB which will equally divide the stress among all pins & keep them in a straight back position & they simply are not strong enough to use as a stand alone connector. You would have to change it again the first time one of those thin pins broke off flush with the housing :-(
Notice that the fingerboard has 5 finger traces drilled out on one side & only 4 on the other. Take the fingerboard with the 5 interupted traces to the left top as in the pic above right & gently feed it through the gauntlet of pins as shown. Make sure that your parts side of the SE EC is also facing toward you.
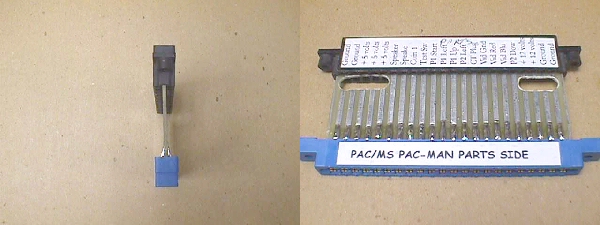
Feed it all the way to the end & line up the eyelets over the traces on the fingerboard as shown in the pic below. If you have an adaptor aid use it to hold the other side of the fingerboard level so that you can tack solder the 2 outside pins on each side of the SE EC or if you don't have one, you can use anything that will slip under the other side to keep it level.
Now turn the the whole thing into a vertical position so that you can eyeball it to see if it is perpendicular as in the pic below left. If it's good to go, just start soldering all pins to the traces on both sides. Note: Don't use a soldering gun on this & don't leave your soldering iron on each position long enough to melt the plastic :-( The proper way is to heat the trace near the pin so that your solder will melt & flow into the pin & through the eyelet. If it is taking a bit of time to heat enough to flow the solder, then you should move the tip back & forth over the pin & trace trying to get it to flow in the least amount of time. If you're running into trouble it's best to just move on to the next one & come back to the troubled one after it cools down for a second shot. Before moving on to step 3, a visual inspection to be sure that no solder has flowed two pins together would be a good idea. You'll have to repeat this step when finished, as well.
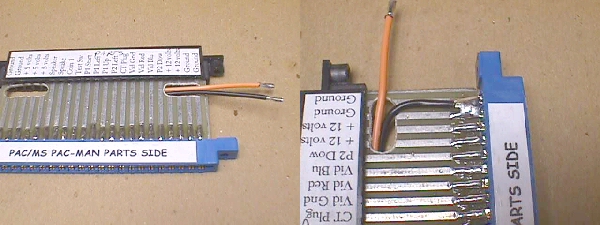
Retrieve 2 18" black & 2 18" orange wires from the stockpile that you set aside earlier. Take one of each color wire with the pre-tinned ends & feed them through the hole that interupts the 4 traces on the right of the fingerboard as shown below. Take the black wire & position it on an angle to cross the last 2 positions on the fingerboard & solder it in making a jumper pad, so to speak.
Now repeat the process for the orange wire soldering it across the 3rd & 4th pins to make a jumper pad as shown below left. Once this is done you flip it over & take the remaining orange & black wires & feed them through the same opening & solder them into like pads on the solder side of the SE EC.
Let's move to the other end of the fingerboard now. Retrieve your 2 18" red wires & feed the tinned ends through opposite sides of the hole that spans 5 traces. These will be soldered diagonally across the 4th & 5th positions on both sides as shown below right.
If everything is going as planned, you should have 2 15" red & 2 15" black wires ready to go. Crisscross the 2 red 15" wires through the the opening & solder each diagonally across the 3rd & 4th positions from the end to form a 3 position pad closing the 3,4,5 positions into 1.
You should see the last move by now, but here it is... crisscross the remaining 2 15" black wires through the opening & form a pad in the same manner across the 1st & 2nd positions on both sides ending up with twin sides that look like the pic below left.
Pull all the wires taut and put a cable tie at the edge to hold them snug. If you don't have a cable tie tool you can use shear cutters to grab & pull the ties tight by utilizing a loose grip on the handles so that you don't cut through until you have them as tight as you want... then snip! Put a cable tie about every 4" which usually works out to be a hand width apart.
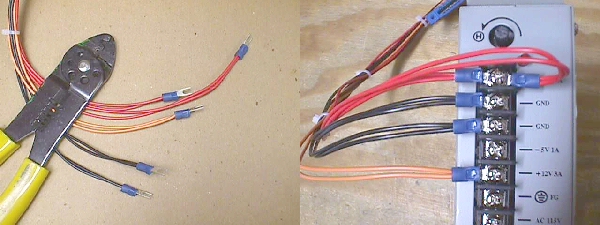
Pair up like colors that best match in length on the unterminated ends of the wire bundle. You should have 4 pair of the same length & one pair of red wires that are a little longer. If any pair ends up with one of the wires being a quarter inch, or so, longer than it's mate, just snip off the excess to make them equal.... not that critical. Strip back each pair of wires about a quarter inch, twist them together & crimp on a spade connector. It should look like the pic below at this point & the adaptor portion is ready to use :-)Do a final solder splash scan to be on the safe side.
The leads hook up to the switcher as shown in the pic with the orange going to the 12 volt terminal, the two reds to the +5 volt terminal & the two blacks being split up between the two ground terminals.
Oh yeah!! Fits like it was planned all along & not just some blind luck :-)
Time to make an AC power in cord. Cut two 14" pieces of black wire & strip back all ends about a quarter inch & cable tie them together. Crimp spade connectors on one end of the pair & on the other crimp on 2 Molex .093 pins & house them. Remember from wiring up other projects... pins on the dead side & sockets on the live side, always & you'll never have one of those unexpected shorts arise in the future. As one hobbyist put it, the voltage receiver gets pins & the voltage giver gets sockets :-) Whatever works for you is best.
Cut 2 more pieces of black wire 24" long... or 2 feet, whichever you prefer :-)... and strip back the wires on one end only & then cable tie them together a hand apart. Crimp on the Molex sockets on this stripped end & house it to mate with the 14" previously made harness. The other end will use the red crimp on splicers to splice into the source AC in the cab.
You can go ahead & install your 14" harness on the AC input terminals of the switcher to complete this portion of the adaptor assembly.
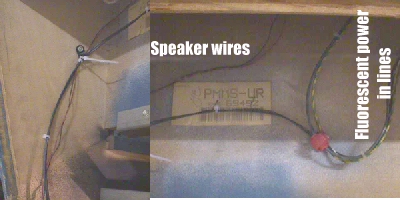
Let's get it in the cab & power it up! I mounted it in 3 different positions in the cab & tested each to make sure there was no interference factors at play... there weren't & each position worked out well being powered from the same source... the AC feed lines that pass above the monitor & go up into the marquee area.
I tapped into the blue/gray wire & the black/white wire at about dead center over the top of the monitor as shown in the pic above. It can then go over & down through the speaker wire cable clamps on the cab side to a central area for powering the switcher.
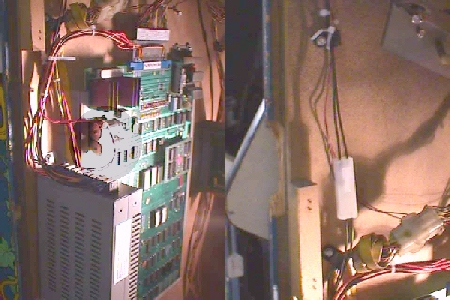
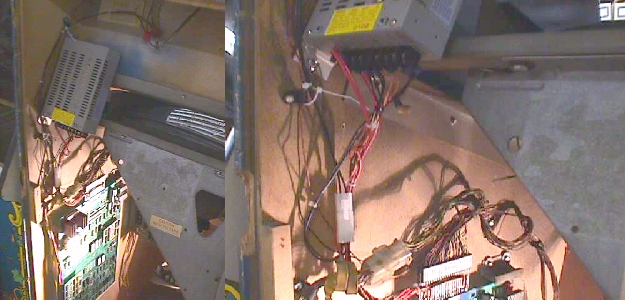
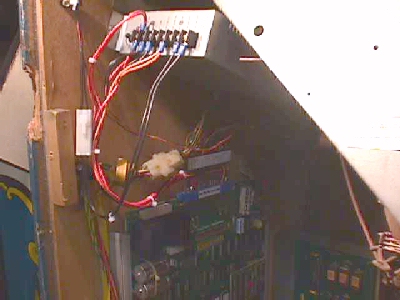
Hey! This is a 7 step program & you're finished :-) Insert the adaptor between the main harness & the PCB, plug up your new AC feed line & see which position best suits you for fastening it to the cab. Here are several ways that I mounted it.
As I said when I launched this a year ago this past February, I just don't have the time to assemble these for sale, but the kits are ready if you are willing to do it yourself & need the parts. If you have a new decent power supply & only need the adaptor parts kit... Pacpower Adaptor Kit... it is only $17.00 plus shipping. If all you have is a questionable old used switcher that you don't want to chance using on a classic game, than you can get a Deluxe Pacpower Adaptor Kit which comes with a new 15 amp switcher... the same as pic'd thoughout here & also the one that has been working so flawlessly for everyone over the past 5 or 6 years... at only $37 plus shipping.
Help Page Index Big Bear's Bulletin Board
Site Index
Step 1

Step 2

Step 3

Step 4


Step 5

Step 6


Step 7
