|
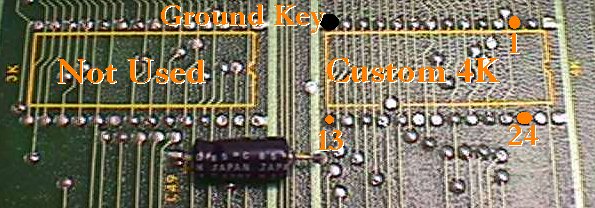
Let me preface this by saying that it has been 20+ years since I did this & everything here is from a few notes I took, my checksum cards, a couple old board sets & my memory... which I'm sure is not even close to what it use to be... so this may be full of errors, but I thought I should record what I could before it is all just a blur :-) Back in the days, when Pole Position was prevalent on the streets, ops were quick to spend a few hundred dollars on an upgrade to Pole Position II to enhance their collections.... income, not games :-) Once the rage died down for Pole 2 it was not a practical conversion to make because it was a labor intensive job involving many components, lots of desoldering & soldering, as well as, adding sockets & programming eproms. Jumping ahead to about 7 years ago, when eprom programmers came down in price & used ones were easy to find on eBay, hobbyists began asking about this conversion. It didn't matter if it took 8 hours, 16 hours or whatever... it was a weekend hobby that didn't put food on the table. I've been reluctant to aid in this because I think it is a job that requires more skill than a novice hobbyist has acquired & could easily result in the death of a classic board or one with many Band-Aids, at the least, but it seems that many have gone ahead & successfully made the conversion, so whatever input I place here can't hurt & maybe will help. The one thing that was a stumbling block was the custom chip needed at position 4K on the CPU bd, so I have aided in providing a replacement that we used back in the day, but other then that everyone seems to have the prom & eprom programming info & able to pull off the conversion with little to no trouble. Perhaps hobbyist are a little more proficient these days. What Does It Involve? CPU Board:
Notes
Happy Gaming... | |||||||||||||||||||||||||||||||||||||||||||||||||||||||||||||||||||||||||||||||||||||||||||||||||||
