Long Buttons - Metal Panel
by Bob Roberts
Here's something that I threw together at three o'clock in the morning to help Patrik from across the big pond & I thought it might help others, as well, so I'll post it here... such as it is.
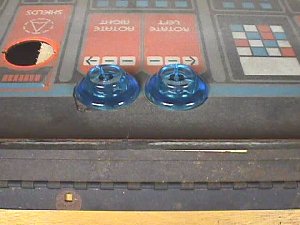
The topic was using long leaf buttons on a metal control panel. The new leaf switch holders are made for wood panels & by adding 2 of the new nylon spacers they can be used for metal control panels with short buttons. To obtain the correct spacing for a long button on a metal panel, you'd need to add 2 more spacers for a total of 4 spacers. If you have the original switch holders that were a 1/4" thicker then you'd only need 2 spacers. In any event, the gist of this conversation was spacing & how I thought the old school way might be better when it comes to using 4 spacers... especially now that the mfrs think that nylon is gold when it comes to pricing them... by simply backing the buttons with the proper thickness of wood.
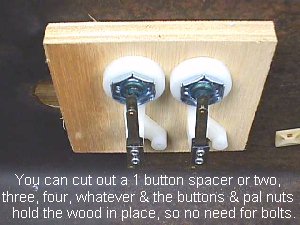
Many times in the past I have backed whole middle sections of metal control panels, although not for spacing & a little on the expensive side since all buttons had to be replaced at the same time. These were on classics with metal panels where the ops would complain of them being bent all out of proportion by rough players using the joystick to drag the game around or by trying to force the character back on screen by banging on the joy :-() The bolts of the joystick & the pal nuts on the buttons will hold the piece of plywood in place & fortify the panel while being completely unintrusive... you can remove it at any time without any signs of it ever being there... no added bolt holes to be plugged or unsightly clamps, glue & etc.
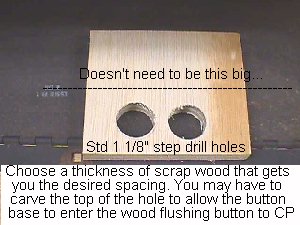
The same thing applies to just buttons that you want spaced properly. You can find a piece of scrap wood that meets your requirements & drill out 1 1/8" holes... 1,2,3 whatever you need... and then just cut off the number of holes needed or back several at one time, essentially, wherever you need the spacing because you may have a button on one side of the CP & the another to the far opposite side making 2 spacers more prudent. Of course, if you plan to back a group of say.. 3 buttons with one piece of wood.. you will have to layout the pattern to match the holes in your metal panel & be careful not to make the excess wood so that it interferes with anything else or you'll end up doing a lot of trimming.
K... here's the example I threw together at 3AM much to the chagrin of my elderly neighbor... nearly 20 years my senior who opened his back door & said, "Mr Bob, do you know what time it is?". I replied, "Sorry, I don't, but I'll be glad to run into the house & find out for you." :-) What's a little table saw noise between neighbors anyway :-) The drill was fairly silent in comparison!


