
Crazy Climber is one of my favorite games.
However, there are a few things
about the interface that I don't like:
Flaw 1.
When you put the game
in Free Play mode, it just sits there with
a static screen waiting for you to
press a start button. It does not display the attract
mode and the image
burns onto your screen quickly if you leave the game on.
Flaw 2.
The default high
scores when you turn on the game spell "Nichibutsu"... 10 letters.
When you
get a high score and it comes time to enter your name, you only get... 3
letters.
Come on, people. You can obviously handle more than 3 letters if you
can have "Nichibutsu" as a name! Besides, I tried the Japanese version of the
game and it lets you enter 10. What a rip!
Flaw 3.
The method for
entering your initials, frankly, sucks. You have two perfectly good
four way
sticks on the game, yet it only lets you move the cursor left and right
and
when you're all the way at the end around "Z", you have to scroll all the
way up
through 3 rows of letters if you want to enter an "A".
What to do about it.
I decided
that, since 22 years have gone by and Nichibutsu has not released an
update
to fix these flaws, I could wait no longer. Something must be done
about these things.
If I were going to be able to truely enjoy the game, I'd
have to do it myself.
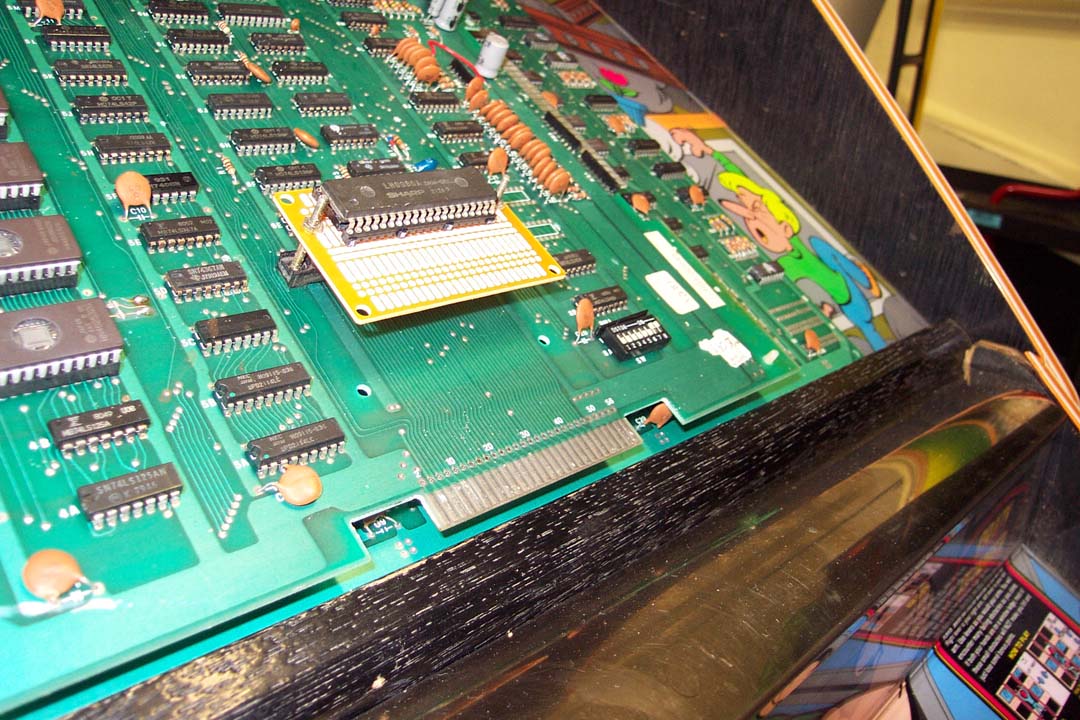
The only problem is, Nichibutsu apparently didn't want folks mucking about
with
their program, so they encrypted their code and instead of a normal CPU,
they used this
weird looking green plastic block.
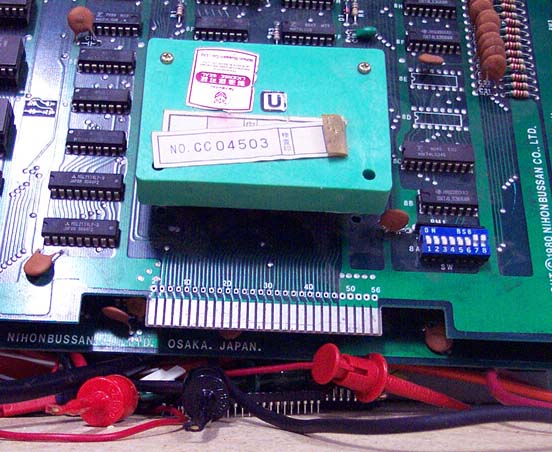
That block is a custom CPU module that decrypts the code ROMs. The good news
is that
someone smarter than myself figured out the encryption table and the
details are in
MAME's Crazy Climber driver
source code. The bad news is that they only encrypted
opcodes and not data.
This means we can't just use MAME to dump out the decrypted
code and burn a
set of EPROMs and install them on the board. The only way MAME knows
what
values are supposed to be opcodes and which are supposed to be data is to
actually run the code.
What they do is create a memory region that's twice as
big as the code ROMs and fill one half
with the decrypted data and the other
half with untouched data. When MAME runs the game,
if it's executing an
opcode, it reads from the decrypted region and if it's reading data, it reads
from
the untouched data. In order for us to do the same, we'd have to burn a
set of EPROMs that
are twice the size of the original and connect the "M1"
pin of the Z80 CPU to the highest address
pin of each EPROM. This works
because when the CPU is executing an opcode, the M1 pin
will be "low" and
when it is reading data, it will be "high" (or the other way around, I forget),
so you
use that to switch between the upper and lower halves of the data in
the EPROMs.
Well, I didn't much like the idea of running wires all over my PCB. But, the
only way to get a correctly
decrypted set of ROMs the same size of the
original would be to somehow play through the game and
monitor what gets used
as what. You could modify MAME to create a log file indicating what values were
used as what. However, you'd need to play through the entire game,trying to get
every last byte to be
read to be 100% sure you've got the two regions merged
correctly. This is near impossible to do by just
playing through the game,
since there will be bits you will miss no matter how many times you play.
I
got into a bit of discussion on this topic with David Widel, who had been
trying this technique with some
other games and couldn't get more than about
93% of a game's ROMs identified with this method. I
had some ideas of my own
on how to get 100% identification, so he sent me his modified version
of MAME
and I went to work on my favorite encrypted game...
Crazy Climber.
There are two types of data that a given byte can be. The first type is data
associated with an opcode.
Here is an example of the first type:
CA C9 0B -- jp z,$0BC9
CA is the opcode (jp z or jump if zero) and C9 0B is the data (the address to jump to, 0BC9).
The second data type is data that is read in chunks, like text strings, level layouts, etc.
After playing through the game a couple times to get a good sampling to work
with, and looking
at all the places that weren't getting executed, I noticed
that all of the second data type in Crazy Climber
was enclosed with a header
and footer that was the same every time... C7 FB [DATA] C7 F3.
Bingo! That
meant that I would be able to identify every single byte in the game without
playing it at all. However, I was actually kinda having fun figuring out how to
get all the code in the game to execute,
so I went ahead and went through all
the code using my newfound information to accurately target the
areas I
needed to get executed, setting breakpoints at key locations and figuring out
the conditions that
would be required to run that chunk of code. It took
about 8 hours of fiddling to get to 100%
identification. Along the way, I
found almost all the interesting bits of code and memory locations that
I'd
need to twiddle to make my mods to the game to fix the interface flaws I felt it
had. (Check out the
bottom of the page for some of the interesting areas I
found.) So, the result of this is we now have
decrypted code that is easy
(realatively speaking) to modify to our (well, at least to my) liking.
The
EPROMs with encrypted code can be replaced with EPROMs containing
non-encrypted code and
the funny green block can be replaced with a standard
Z80 CPU. Sounds grand, but there's one
problem... the socket the green block
plugs into is not a standard CPU socket. In order to run
unencrypted code on
an original PCB, you will need to make an adapter.
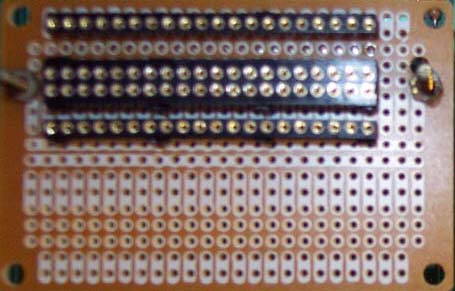
I started with one of those little blank PCBs from Radio Shack, bought a 40
pin wire wrap
socket and a 40 pin machine pin socket and went to work.
The existing socket is a 40 pin custom connector similar to an IDE connector
on a PC. I cut the center
plastic braces of the wire wrap socket and flipped
the two sides around so they would fit right next
to each other on the blank
PCB and match the spacing of the "IDE" connector. The pinout is a pin for
pin
match of a Z80, so it's not too hard... It went from this:
oooooooooooooooooooo
>||
||
|| ||
oooooooooooooooooooo
to this:
oooooooooooooooooooo
oooooooooooooooooooo
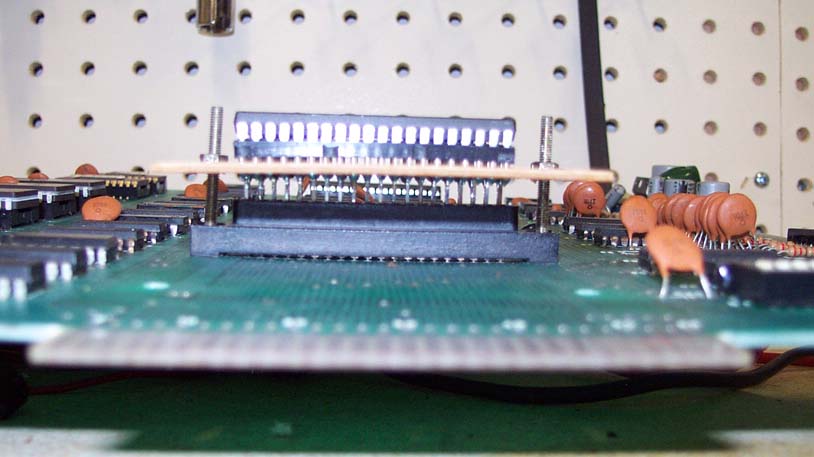
Then I cut the center plastic braces on the machine pin socket the same way
and placed the rows
on either side of the wire wrap socket, and connected the
two sets of pins, like so:
oooooooooooooooooooo
| | | | | | | | | | | | | | | | | |
oooooooooooooooooooo
oooooooooooooooooooo
| | | | | | | | | | | | | | | | | |
oooooooooooooooooooo
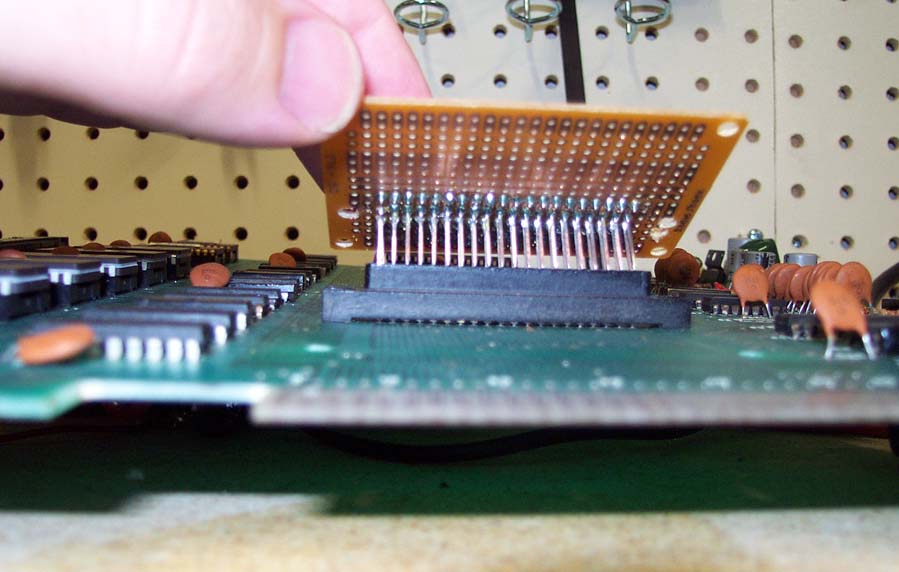
The wire wrap legs sticking through the bottom of the PCB plug into the "IDE" socket.
A standard Z80 CPU fits into the outside rows.
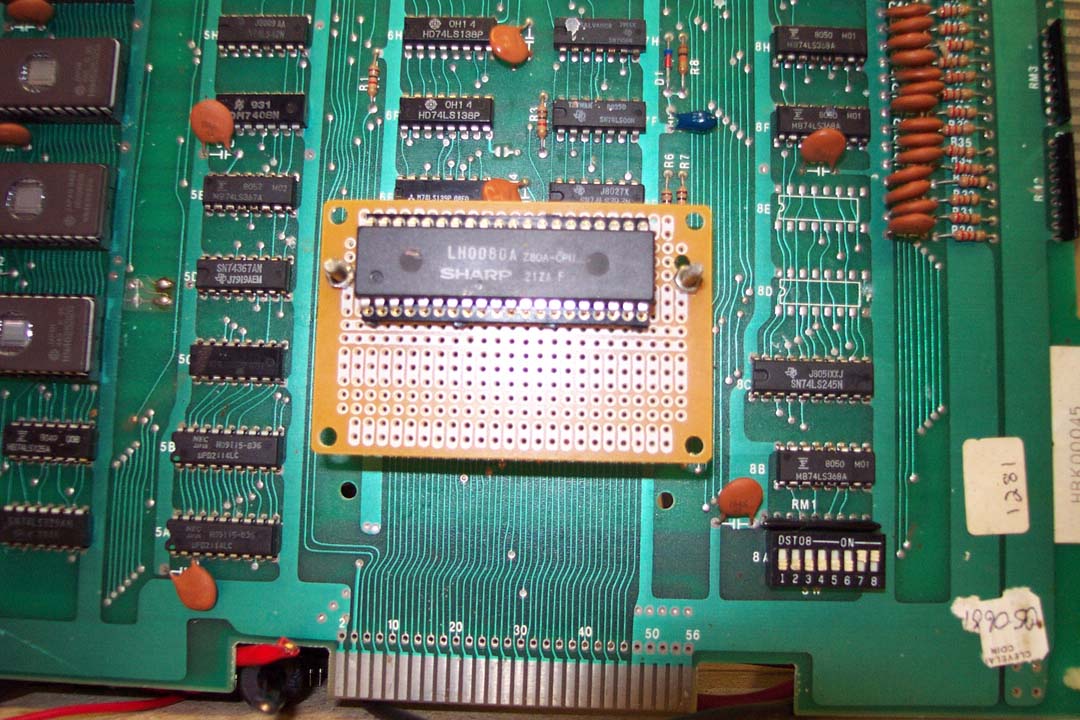
I used the original nuts and bolts from the green block to secure the new PCB.
All done. This board will now run a set of standard sized, unencrypted ROMs
(provided you haven't
plugged the CPU in backwards). See below for a download
link.
Fix 1.
Whew. Now that that was
all done, I set about making my changes to the code. I started with the
Free
Play mode. I first disabled the existing Free Play code and found some unused
areas to write
my own routines. I made it so that if the Free Play dip
switches are on, if you press one of the start
buttons at any time, it'll add
the appropriate amount of credits and start a game. I also changed
the
attract mode during the high score display to tell you Free Play mode is
on and lengthened the time
the high scores are displayed slightly. Here's my
new code with comments so you can follow
what I did:
So, now the game will display the attract mode when Free Play is on, greatly
reducing the chance of
burning an image on your CRT.
Fix 2.
Next was the number of
characters for the high score. That part was real easy. All I had to do
was
change the $03 at location $0C8A to a $0B.
Fix 3.
Lastly, I needed to fix
the high score inital entry routine to be easier to navigate. Here's my new code
with comments so you can follow what I did:
That makes it so if you press down on the left stick, the cursor moves, down,
press up and it moves up.
If you press left while the cursor is on "A", it
scoots down to "END" and if you press right on "END"
it goes up to "A".
Ahhh... much better! You can download ROMs with these patches already
made
from the download area at the bottom of the page.
Here are some interesting areas I found while poking around:
| Location | Description |
| 00EA | Adds four credits if Free Play is on |
| 01BE | Code that checks to see if you're playing when a credit is added |
| 03A7 | Code that determines the number of lives in game |
| 03C1 | Code that determines the score needed to win an extra life |
| 03E2 | Code that determines the credits per coin (04 was Free Play) |
| 0402 | Code that determines the coins per credit |
| 0432 | Adds four credits if Free Play is on |
| 058F | Code for accepting credits and starting a game |
| 05E8 | Code for a delay |
| 0611 | Code to detect start buttons being pressed |
| 07F4 | Code that displays the title screen |
| 0A0D | Code that writes "FREE" on the screen |
| 0A5B | Code that writes "Push 1 or 2 Players Button" on the screen |
| 0BB3 | Code for entering high score initials |
| 0C8A | Number of characters for high score initials |
| 0DA8 | Easter Egg! If you entered "JORDAN.LTD" as your high score initals it chops off the ".LTD" part and adds two credits. However, since they cut the number of characters you can enter in the US version down to 3, there's no way to enter 10 initials. Only the Japanese version will let you. Go ahead and try it on the US version with my hack to let you enter 10 letters. |
| 0E37 | Code that displays the high score table |
| 80D9 | Memory location holding your current score |
| 80D3 | Memory location holding the current number of lives during play |
| 807A | Memory location holding the number of credits per coin |
| 8075 | Memory location holding flag that says if a game is in progress |
| 8072 | Memory location holding the number of credits |
| 8095 | Memory location holding high score table |
| 8080 | Memory location holding flag that says if it's a 1 or 2 player game |
Downloads
| ccdecryp.zip |
Decrypted US version of Crazy Climber to use on a PCB with a standard
Z80 in place of the green plastic block. |
| ccplusde.zip | Decrypted US version with my changes applied. Includes 5 new ROMs. C11, C10, C9, C8 and C7. |
| ccplusen.zip | Encrypted US version with my changes applied to use on an original PCB
with the green plastic block still in place. Includes 2 new ROMS. C11 and C7. |
If you need to yell at me, email me at tim@arcadecollecting.com
